Thursday, April 22

Better late than never.....eh...

Congratulations to the two winners of the blog
candy!!! Sorry I was late getting this on here too....
I had a last minute getaway home to Indiana to
visit with family!!
Alright so Dennis and Brandy you get first pick of the
card box and 'T' you get the other one. Just shoot an
e-mail to me at sarahowens1@hotmail.com
with your address and I will get these off in the mail.
Whatever you do have a great day!!!

Monday, April 12

A little help


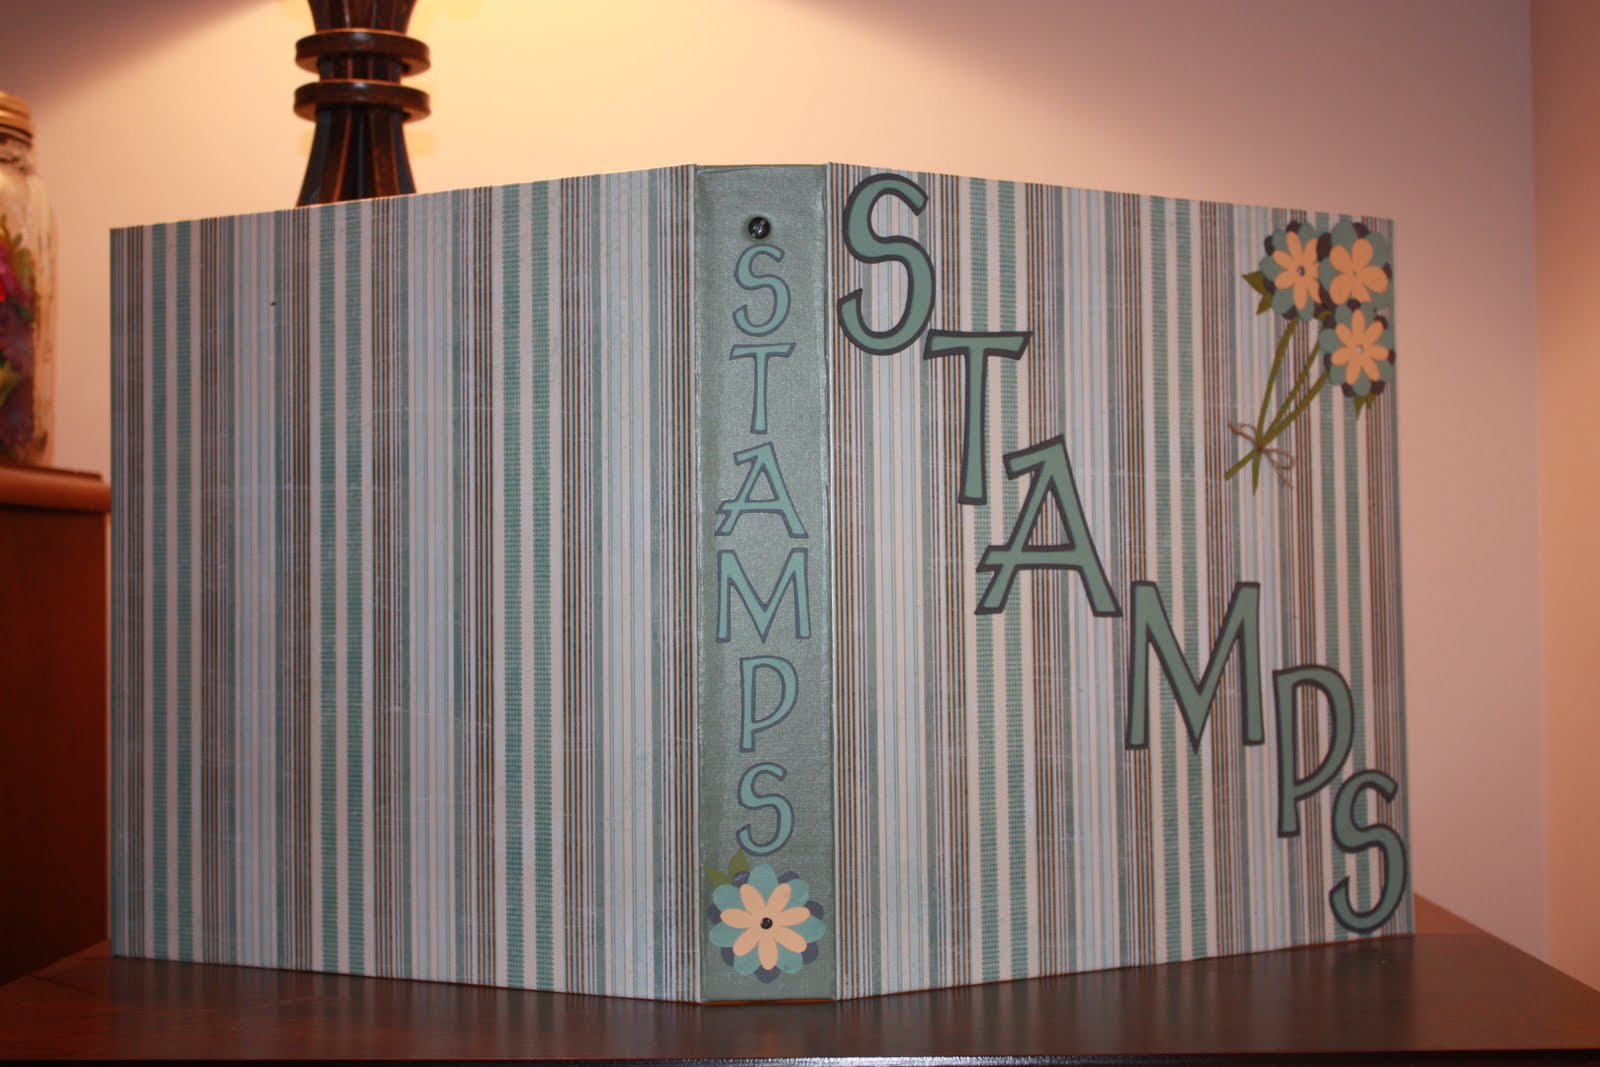
So, I took this ordinary binder I got on clearance


at a computer store and turned it into this.


I just took a reagular binder smothered it with


Mod Podge


Picked some paper that I liked and stuck it on.


Then I used my Cricut for the flowers and the lettering....and I layered


them and played around a bit and came up with this.


.... I needed some help to get my


stamps somewhat organized. That is pretty hard


to do because we are in temporary living right now.


I saw this idea on someone else's blog and I thought


this is perfect for me right now....and it will help later too.


So obviously I can't fit my stamps inside here


but tomorrow I will show you the indside and explain


just how this little binder is going to be a huge help


and timesaver to me with all of my crafting.


Whatever you do have a great day!!!!

Tuesday, April 6

Bird on a Branch

I have had my eye on this set for some time now....
and I finally got it....oh man I am so EXCITED!!!!
This is the first card I made with it and it
definitely will not be the last....why do I love cards
with birds so much? Maybe I am crazy......
Is there something that you just lean
toward when you are crafting...or reading...
or doing any other hobbies?
----------
Here's what I used:
  • Soft Suede card stock #115318
  • Close to Cocoa card stock #101341
  • Blush Blossom card stock # 103318
  • Very Vanilla card stock # 101650
  • Melon Mambo card stock #115320
  • Bird on a Branch stamp set #113266
  • Melon Mambo & Soft Suede marker #116329
  • Blush Blossom marker #100037
  • Creamy Caramel marker #100078
  • Soft Suede polka-dot ribbon #115612
  • corner rounder punch
  • SNAIL adhesive #104332
  • Scallop border punch #112091

I just want to throw it out there that the

occasions mini catalog will only be around until the

end of this month....so you had better hurry and check it

out before it's to late and you have to say goodbye to some

really really nice things.....just click here to see the catalog.

Whatever you do have a great day!!!

Monday, April 5

My good friend Tiniel....this is her

Is going to be walking in a "Relay for Life"
to raise money for finding a cure for cancer.
Tiniel is an amazing woman, friend, mother and wife.
Not only does she want to raise money to find
a cure, but she wants to give something to
those who are willing to donate and help.....
Check out her story here.

Thursday, April 1

Kindness and Gratitude

Alright....so this flower on the card....is the
same from the tutorial yesterday. Except for
on this flower I used plain card stock and stamped
an image using the Define Your Life stamp set.
I wanted you to be able to see some of the
definition inside the flower when you looked at it.
I also did some stenciling on the card using the
Stampin sponges, a stencil and a scallop circle punch.

And I am pretty happy with the results. I don't know how
I would mail this card because the flower does stick
up from the cards pretty far....but it would be great
to give to someone face to face.....I am sure you could
mail it to....you would just need a bigger special envelope.
Here's what I used:
  • Very Vanilla card stock #101650
  • Cameo Coral card stock #100475
  • Chocolate Chip classic ink pad #100908
  • Cameo Coral classic ink pad #103035
  • Barely Banana classic ink pad #101170
  • Old Olive classic ink pad #102277
  • Define Your Life stamp set #114950
  • Lovely Letters Alphabet stamp set #115030
  • Mat Pack #105826
  • Paper Piercer #116631
  • Stampin Sponges #101610
  • Scallop circle punch
  • brad

Whatever you do have a great day!!!!

Paper Flowers

First you need 5 scallop circles
I use double sided paper....that way I know
they will look good together and it brings so much
more color to the flower.
You don't have to do this but I like to....
I sponge the edges....chocolate chip....but obviously
you can use any color you like or no color at all.
Here is the sponged edges with both sides
of the paper.....
Now you just crumple up all the scallops
really really really good!!! You can't mess this
up.... Just have fun with it.
Now you unfold them and stack them in the
order you would like them to be in.
Here I use my Mat Pack and paper piercer.
These tools make it so much easier to
place a hole and then a brad!!!!
So with all 5 stacked pierce a hole right
into the middle.
If you used the Mat Pack then you simply
pull out the paper piercer and the hole from it stays.
Then you can slide the brad right into it.
If not then....I used to jab a small pair of scissors
into the center or just stick the brad in piece by piece.
So now you get to crumple some more....YAY!!!!
Start with the top scallop and crinkle it to the middle...
then do the second layer....then the third layer
do you get where I am going?
So below I have 5 different flowers at each
crumple stage so you can see the progression.
Now that all layers are crumpled up nice and tight....
you can start uncrumpling....
gently tug out the bottom layer, but don't flatten it out
you want it to still be in the shape of....well....
kind of like a bowl, a wrinkly paper bowl.
Now do the next layer
Keep going with the next layer.....
and the next one....

And finally open the last layer just enough
so you can see the brad and the inside paper.
And you have created some very unique beautiful
flowers. Here are the 5 flowers that I made.
1 & 2
3 & 4

and the last 5th flower....
I hope you like these flowers...they are really very pretty
flowers!!! You can have so much fun mixing and matching
colors to go with anything. You can even leave some of
the inner layers crumpled to make it look more like a bud.
Just have fun with it....that's what crafting is all about.
(Sorry for my made up words.... ;) )
Whatever you do have a great day!!!

Wednesday, March 31

One of a kind


I really struggled trying to figure out
how to use this stamp set. And I have
a cricut that I love but am not really
familiar with.....so I decided I would
reach out of my comfort level and try some things
that I had not used very much.
----------
I am really happy with the end result.
I started off with only one card and accidentally
made the birds too big....like I said not to comfortable
with the cricut yet....but my mess up gave me an idea
for a slightly different look which resulted
in the second card that I love too. So even mess ups
can end good!!!
Alright, well I just love these cards and I love that
it's good to be different. Well at least that's what I
tell myself when people look at me funny because
I do something silly....hehehe
Here's what I used:
  • Not Quite Navy card stock #101722
  • Kraft card stock #102125
  • Very Vanilla card stock #101650
  • Chocolate Chip classic ink pad #100908
  • Not Quite Navy classic ink pad #103008
  • Earth Elements brads #106955
  • Define Your Life stamp set #114950
  • Mat Pack #105826
  • Paper Piercer #116631
  • Stampin Sponges #101610
  • Cricut
  • George and Basic Shapes cricut cartridge
  • Stretch Your Imagination cricut cartridge

Now that I have actually used this stamp set

I love it!!!! And I have so many ideas just running

through this brain of mine....one of which you will

see tomorrow....so come back tomorrow.

Whatever you do have a great day!!!

Tuesday, March 30

Welcome Neighbor


Here is a little something I came up with for
a new neighbor....but I guess it's universal
enough that if you just wanted to say hello
to a friend you could use it, or an existing
neighbor that you already know and love.
Whatever tickles your fancy.
----------
I have had this paper sitting in my drawer
just bored as could be....every once in a while
I swear I could hear a faint "use me please"
coming from the drawer it was in.
So I answered it's plea and am
quite happy with it's new home on the card.
Here's what I used:
  • Bermuda Bay card stock #115317
  • Crushed Curry card stock #115319
  • Welcome Neighbor DS paper pad #118401
  • Whisper White card stock #100730
  • Many Marvelous Markers #105541
  • Good Neighbors cm stamp set #119116
  • Scallop Trim Border punch #118402
  • 1 -1/4" Square punch #104400
  • Versa Mark stamp pad #102283
  • Vintage brads #109109
  • Outlined for Fun stamp set
  • Brown embossing powder
  • Heat gun

Enjoy.....Have a great day!!!!

Monday, March 29

Silly Sealife


I tried something new on this card....

I did watercolor painting on the

background for the little fishies.

I used Stampin Up!'s aqua painter

and their stamp pads to create an

underwater look on the watercolor paper. I think it

turned out pretty alright....especially for my first.

Woo-Hoo.....

I love this stamp set....it just makes me smile

every time I see it. I hope you enjoy it too.

----------

I just really enjoy trying new crafts!!!

What are some crafts you enjoy doing?

Maybe I can learn a little something from

you....so tell me....what gets you ticking?

Friday, March 26

Double giveaway!!!

This time around we are going to have 2 winners!!!!
The first name drawn will get first pick of the
two paper boxes, and the second winner
will get the one that is left.
Alright so you know the rules and if not I will list
them for you so get ready to comment or send
someone to the blog......
Here is how you can win this wonderful
paper box with 6 matching cards and envelopes!!
#1
Leave a comment on this post
( 1 point possible )
#2
Tell a friend and have them leave a comment
with a shout out to you
( 1 point for them, 1 point for you for each friend)
#3
Follow my blog
(2 points)
It's that easy....and you know what else
is easy.....these boxes!!!!
These were made using one sheet of 2 sided
designer paper....and the 3 pieces of cream
colored paper for the cards.
It was so easy and so fun and when you are done
you have 6 beautiful cards that match the box
that they are in perfectly....life just got a little
easier. Clean, simple, easy cards....in bulk!!!

To decorate the cards I added a flower, or
embellished with some buttons or ribbon.
It was so easy and pretty fast for making 6 cards.
This would make a great gift for someone.....
or you could simply have them stocked up
in you home so when you need a card quick you
have on handy. and it looks cute until you need it.
WIN....WIN!!!!
Well that's all for today....good luck
Whatever you do have a great day!!!!